Step 2
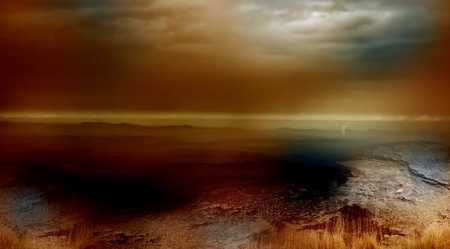
Now let’s load the “cliff” image into Photoshop, then drag the entire image onto our canvas, resize and position it as shown below:
Now let’s load the “cliff” image into Photoshop, then drag the entire image onto our canvas, resize and position it as shown below:
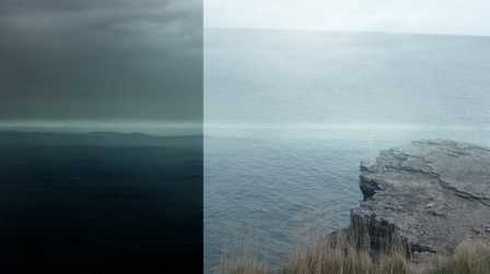
Here comes the interesting bit: grab a really soft (0% hardness), big round brush, erase the ocean part and the edges of the cliff off – the ultimate goal is to try and blend the cliff into our image as seamless as possible:
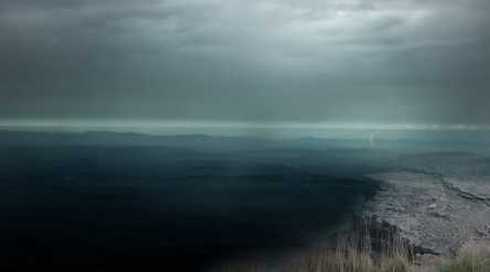
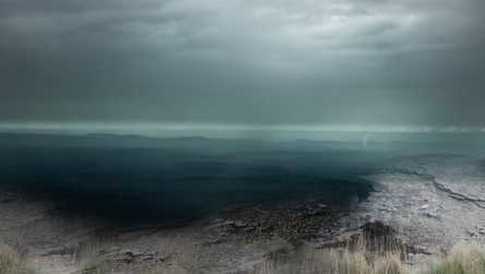
Now we have the cliff texture here, however it looks quite boring to me with just a single bit sort of sticking out. So I decided to extend it a bit to cover the entire lower portion of the canvas.
This is probably the most tricky part of the tutorial – The goal we got to achieve is to take this cliff texture and somehow make it longer to cover the lower portion.
To do this, following the following steps:
Also try to experiment layer blending mode with each layer, you will discover how powerful those layer blending modes are.
Here is my effect after the blending and duplicating: (This effect is made by around 10 duplicated cliff layer texture)
:
This is probably the most tricky part of the tutorial – The goal we got to achieve is to take this cliff texture and somehow make it longer to cover the lower portion.
To do this, following the following steps:
- make serveral duplicates of the original cliff layer
- use the same method as described in the previous step to erase the edge portion
- on each duplicated layer, use Ctrl + T to free transform them so they look different.
- Then drag them to across the canvas to form a joint cliff
Also try to experiment layer blending mode with each layer, you will discover how powerful those layer blending modes are.
Here is my effect after the blending and duplicating: (This effect is made by around 10 duplicated cliff layer texture)
:
Add the following three image adjustment layer and their respective layer mask to it:
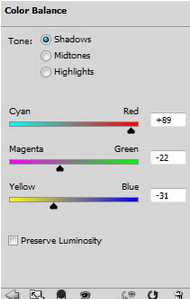
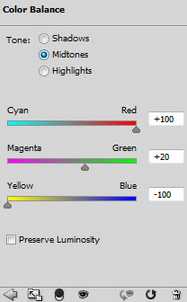
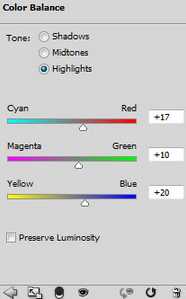
Color Balance (Drop opacity to 70%)
Color Balance (Drop opacity to 70%)
|
|
|
The result is this:
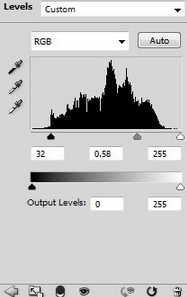
Levels:
|
|
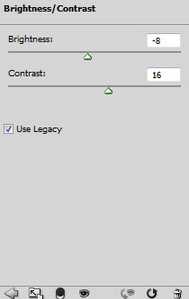
Brightness & Contrast:
|

|
And here is the effect so far. You can see I deliberately produce those color and lighting dynamics through layer masking and blending options – they will be used in future steps.